Saturday, August 3, 2013

Bring on the Garlic Sauce!!!

It took me some time, but thank goodness I can finally say the words again… Garlic Sauce!


If you’re confused, I’ll quickly explain. Back in 2012, local calypsonian All Rounder sang a “witty ditty” about his ahem... "affection" for the condiment. Now, here at home, we love garlic sauce and most food eateries have it on the ready with the usual ketchup, mustard and peppersauce. With the advent of All Rounder’s song however, the humorous double entendre was just a bit too much... 

If you’re wondering about the song, here is a link to the video. 

Trust me, the video is comparatively tamer than his live performance of the song, and believe me when I say that it’s the live performance that put me off eating (and even making) my own garlic sauce for a few months well. (Luckily, I have a very understanding family.)

Well, enough time has passed and I have been making my sauce again. Now when it comes to the actual dressing, nearly every household has their own version. Mine is a personal combination of sweetness and tanginess with a good bit of fresh herbs for flavour, and every time I make it, it disappears really fast. (I’ve actually eaten this on Crix crackers too… it’s that good.


Wanna see how the goodness comes together? Read on.

I used roughly 10 to 12 cloves of garlic to make this sauce. I peeled them, cut the root end off and chopped them in half before putting them into my mini chopper.


Next, I took one green pimento pepper, cut it in half, then de-seeded it. It was also chopped roughly and dropped into the mini chopper.


The next three ingredients were a good sized stalk of chive, three leaves of chadon beni and a little fresh thyme. Just like before, I chopped the first two and then peeled off the leaves from the thyme and added them to the rest of ingredients.


A juicy lime was cut and squeezed to give me two tablespoons of juice. This was followed by a level tablespoon of brown sugar – more will be added to taste – and then about ½ to ¾ cup of mayonnaise.

Lastly, a teensy pinch of salt went in.


It was then covered and whizzed, then checked for consistency and flavour. Another level tablespoon of brown sugar was added, plus a tablespoon or two of tap water to loosen it up a bit before whizzing again.  


Perfect. It was then decanted into my measuring cup. As you can see, this gives you roughly less than a full cup of sauce.

I simply poured the delicious sauce into my squeeze bottle. Yum!

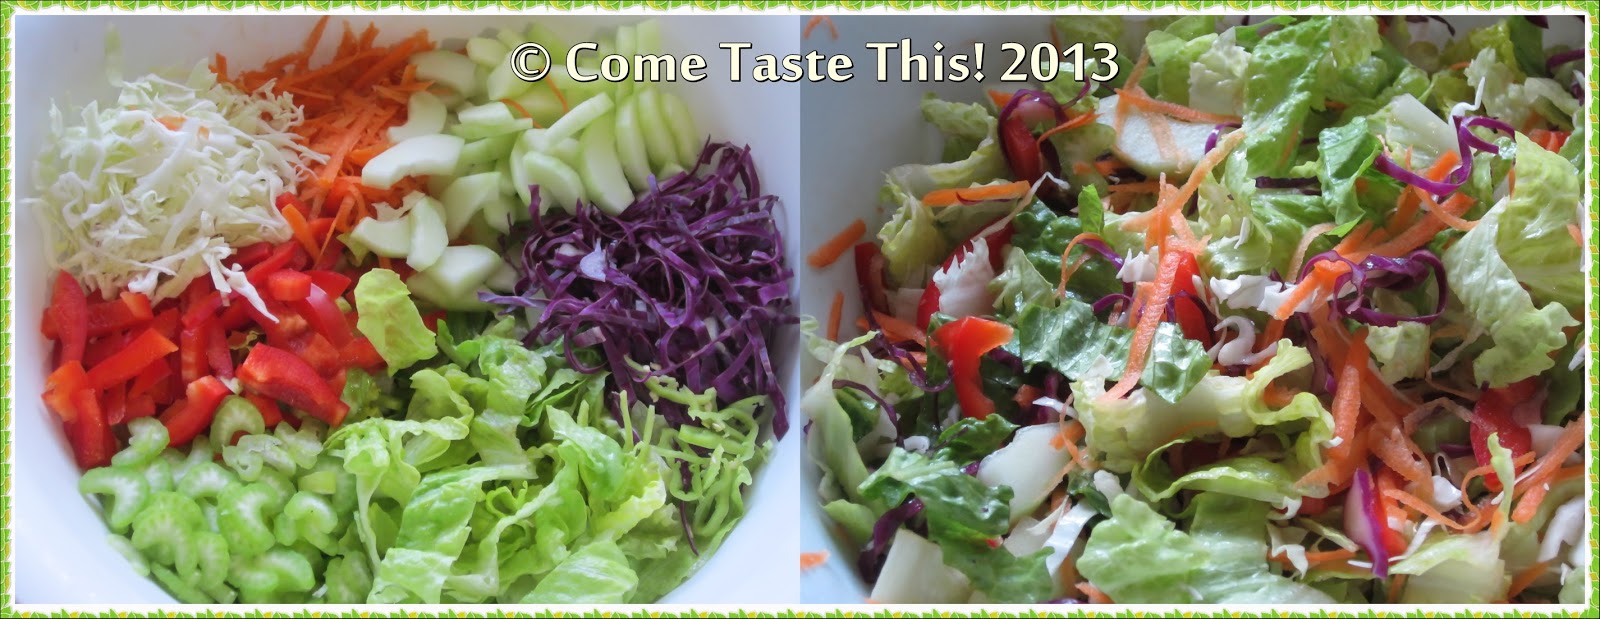
Beforehand, I had prepped ingredients for my festive salad: white cabbage, carrot, cucumber, purple cabbage, green pimento peppers, romaine lettuce, celery and red sweet peppers. Everything was tossed together and chilled so they remained as crisp as possible.
A little salad was added to my plate, and the tasty garlic sauce was squeezed on… absolutely delicious! 

As you can see, mine was still pretty chunky, but you can take it further if you like for a finer grind. This sauce can stay in the refrigerator for up to a month, but believe me… my family never leaves any behind for that long.  Enjoy it on anything. We love putting it on salads and fish, but fries, potato salad or boiled provisions taste great with it too.

So, here’s to another cooking adventure, and I hope that you give this sauce a try. Have fun and like I always say, don’t forget to mind the pot!

Wednesday, June 5, 2013

Egg Fried Rice - My Way!

It’s been a long time since sharing my kitchen happenings, I know. 

Truth be told, I was going through a rough patch, both family wise and health wise. I won’t go into too much detail, but I will say that thankfully, things have levelled off and I thank God for that.
I will confess, though… I thought of letting my little blog go. But I had an intervention from one of our country’s foremost food bloggers… if you’ve ever visited Simply Trini Cooking for a quick recipe for one of our local dishes, then you know who I am talking about. Mr. Felix Padilla himself.

It was truly an honour to chat with him, and when I tell you that we talked about food for more than 4 hours straight, you must know. In that time, he reminded me why we food bloggers need to keep doing what we are doing, and that real food love never dies. We Trinis are an inventive people, and the very meals we prepare are a testimony to that. It’s necessary to see how others do things, so we can always learn and also compare.

“Please don’t stop blogging,” he had told me. “You have to continue.”
I gave him my word.
Now I had no idea at all what my new subject was going to be, but then it hit me when I was trying to figure out a simple side to go with some oven barbecued chicken I was making, and knowing the vegetarian child I have, it had to be something that could also stand on its own. And then I saw the leftover cooked white rice I had in the fridge and realised that I had a good bit of fresh vegetables to play with, the results of which you are seeing here today with my entry for June 2013, my version of egg fried rice, which went a little something like this…

One thing I realised is that when you’re making fried rice, there’s a lot of chopping involved. Here you see a carrot that was diced really small, 2 stalks imported celery (chopped), a small bunch of chive (chopped) and three red pimento peppers (chopped). I also diced up a small onion (not photographed) and had a cup of thawed frozen green peas (also not photographed).

Next, I diced up some ginger to make about 3 tablespoons or so, plus 3 large cloves of fresh garlic.
I opened up a can of baby corn and cut them into chunks.


The next things to prep were the wet ingredients; two eggs, oyster sauce and some light soy sauce. The eggs were beaten until fluffy. Unfortunately, the oyster sauce I had was literally ‘on its last’, so I simply added a few tablespoons to the bottle and swished it about so every last bit of it came out the bottle. 

Now for the cooking…
I got my old, faithful saucepan, placed it on medium heat and added a little olive oil to it. I poured in the eggs – did not season them at all – and let them cook. A soon as they were set, I folded them over like an omelette, and set it aside on a plate. I then took my knife and cut it up into small pieces so they would be ready for the second to last step.

The same pan then received a potspoonful of soya oil, and was placed on medium high heat. I added in the ginger, garlic, carrots and onions and let them cook for a couple of minutes so the carrots would get a head start. Next came ¾ of the chopped pimento peppers and all the chopped celery, followed by the green peas. Everything was stirred and cooked for a couple more minutes.
Next came the cold cooked white rice; it was stirred in carefully so everything was evenly blended. (You can imagine the lovely scent coming through the kitchen…)

Now this next part went pretty fast. In went the mixed soy sauce and oyster sauce, the cut up baby corn, the remainder of pimento peppers, the chopped fried egg and ¾ of the chopped chives. Everything was gently, yet quickly stirred  for a minute or two and taken off the flame.
And next thing you know, POT DONE. All it needed was the remainder of chives to be placed in the middle.
I enjoyed this delicious and fragrant rice with two pieces of the oven barbecued chicken, a little cooked barbecue sauce and a quick salad of romaine lettuce and tomatoes.

I must say that it felt really good to do this blog entry. As always, my family enjoyed this meal with gusto and I felt even happier seeing them take leftovers with them to work as well. That egg fried rice was truly delicious! (And yes, it does feel good to blog again, hahaaa!)

Huge thanks goes to Felix for getting me back into the swing of things, and it hope that this will be the first of more to come for 2013. Thank you so much for viewing my new entry and take care, my friends.

And like I always say, don’t forget to mind the pot!

Sunday, February 10, 2013

Back on the Blog with Spicy Geera Pork


Well, yes, allyuh… I am finally back, so Happy 2013 one time, (don’t mind the year is two months old already and it is literally Dimacnhe Gras - the Sunday before Carnival in T&T).

Though I am seriously tardy with posts, I must admit that waiting for today to post to the blog was timely, since at Carnival time we really enjoy eating. Just yesterday I revisited my Granny’s split pea soup with pigtails and it was so good, I had to secure some for Sunday lunch. So shocker of shockers… there is no pelau in the house for Carnival. But that’s fine, cuz I made sure to have an eclectic mix of foods in the fridge, from salted fish right down, so you know some home made bread is on the menu later too.


So… what to do when you’re feeling peckish? You make one of this country’s most loved cutters, geera pork. If you’re wondering what geera is, it’s a spice that’s also known as cumin and it’s much loved in East Indian cooking. I tend to use lots of it when I make a filling for fried potato pies too – it’s such a homey, comforting spice that says “T&T”.


Now I must confess that the first time I was introduced to “geera-ing” food was from my friend Joseanne Henry, who taught me how to do some geera chicken wings (thanks Joseibaby!). Over time, I adapted her original recipe into this one I use for geera pork, which has been my go-to ever since. Truth be told, you can geera almost anything, wings, necks, pork, fish and even vegetables. It's not too difficult; just use some pork, vegetable oil, seasonings and of course, some good geera powder.

Here’s a peep into the bacchanal.


First things first: I always season my pork. I used a nice pork loin that I cut into 1 inch pieces and seasoned with lime juice, salt, chopped chives, ½ a small onion, 2 pimento peppers, and a couple leaves of chadon beni. Left it to marinate for half an hour.


Next, I poured a potspoonful of vegetable oil into my deep saucepan and put it on medium high heat. I cut 3 more pimento peppers in half and tossed them in the oil with a whole, peeled clove of garlic.


Time to cook the geera! When my peppers and garlic got good and sautéed, I added in about 3 tablespoonfuls to the oil and seasonings – I was pouring from the packet, so I averaged it, no scene. Gave everything a good stir and almost got high off the lovely fumes as well…


In went the seasoned pork, which was stirred well into the geera; every grain seemed to cling to the meat like a tight pair of jeans!


Once everything was coated with the geera and the meat looked saturated, I covered the pot tightly and left it for 10 to 15 minutes. This is the stage where the pork started letting its juices out, so it was literally “stewing”. (See the moisture under the lid?)


Opened the pot to reveal a cloud of steam that soon dissipated to reveal the lovely pork swimming in sauce.


I started seasoning it up. A little salt and pepper sauce (to my strength) were stirred in and I let it continue to cook until the liquid evaporated.


Tasted a piece, only to realise it was still a bit tangy, so to counteract that, I sprinkled in a little brown sugar (roughly a teaspoon). I then added a ¼ cup of water, stirred everything in, and lastly, a teaspoonful more of geera – worry not, it cooks as the liquid evaporates. Kept my eye on it, and soon...

De POT was DONE!

Tender. Spicy. Delicious Geera Pork.


Geera pork is one of my favourite things to make, and I don’t have to wait for a special season to do it, either. Today, Dimanche Gras, it was a perfect choice for Carnival. It is usually served in little Styrofoam cups with a spoon, so it makes for a BESS cutter at any lime, especially when drinks are flowing non-stop.


Of course, it was devoured hastily, despite the fact that I love it at room temperature, which is how it’s generally served. This here was just right flavourwise; enough pepper not to go overboard and perfectly seasoned, ready to be enjoyed in some hops bread or plain in a Styrofoam cup.

So that’s the start to my 2K13 Carnival, everyone. Hope yours is just as much fun as mine at home. Stay tuned for more kitchen escapades in future and like I always say... doh forget to mind de pot!