Friday, August 31, 2012

It’s Corn Soup Time!


Happy 50th Anniversary of Independence, Trinidad and Tobago!

Yes, we are 50 years old today, and the nation is in the throes of celebrating becoming an independent nation.

Am I celebrating? Yes, in my own way, with television, my standing fan and my comfy bed. I am also thankful that I am not in the office today. Really, I felt like I had to change my address at one point and move into my desk, but I digress….

I must apologise for not being able to do the weekly blog thing; it has truly become impossible now. This month has been both trying and difficult. However, thankfully, I am eager to see what the next month will bring foodwise and I am able to give some love to my kitchen again.

Today’s food of choice is actually something that’s my huzzy Errol’s specialty, and it’s none other than corn soup.

Corn soup is something that is inherently Trinbagonian and can be made in so many ways to accommodate different palates. I’ve done it without salted beef, or using coconut milk instead of plain water, or even added a can of creamed corn to it to enhance the taste. There are both meat and veggie versions. Some folk start them off with yellow split peas. Some use channa (chick peas). They’ve been provision filled or broth-like, or even had little dumplings floating in them… yup… it’s that kind of soup, and I love it no matter which way it’s prepared.

Now, this version of corn soup is Errol’s personal favourite recipe and it has been shared with many of our friends in various settings, from weddings to limes (get togethers) at home. I had to seek permission to share it here, of course – you know how these fellas can be with their special dishes, hahahaaa! Now, if you’re seeing something different from what you’re accustomed to, don’t fret. Every household has their own method of preparing something they love. My corn soup is different from his, yours is different from mine, and so on. The main thing (I always say), is that you cook with love and every dish you are preparing will reward you tenfold.
 
So, here’s how Errol 'turns his pot' of provision filled corn soup…


Like every pot before, his corn soup started off with fresh corn from “de man with the truck”. Approximately 10 to 12 were peeled (or shucked as the North Americans say) and the silk (or strings as WE say), removed.


The next step was the chopping the corn into slices, about an inch thick. I started with a regular sharp knife, but soon moved on to the ‘Chinee-chopper’. KYAAAAH!!!

See? All chopped up.


Next, I got 1 cup of yellow split peas, washed it and put it to boil in about 2 ½  cups of water, a teaspoon of salt and a teaspoon of baking powder – an old trick to help soften the peas quickly.

While that was happening, Errol and I got to peeling and chopping up the provisions and vegetables for our soup. Five green bananas from our tree, 4 red skinned potatoes, 2 huge sweet potatoes and 2 ripe plantains, were prepared and put into a bowl.

We had run out of pumpkin, so we used butternut squash instead, and also chopped up two carrots (which I forgot to snap a photo of – silly me!).

Fresh seasonings were prepared next. A bunch of chive, a bunch of chadon beni (culantro) leaves, 2 stalks local celery, a large bunch of fresh thyme, 4 large garlic cloves and 5 pimento peppers were chopped.


As soon as that was done, the giant soup pot – aka large pressure cooker – was 2/3 filled with water and the corn and provisions (green bananas, ripe plantains, regular and sweet potatoes) were put in to boil for 5 to 8 minutes.


By this time the yellow split peas had finished cooking and were nice and soft, with swollen grains that yielded easily when pressed with a finger. These were strained and added to the pot.


Next to go in were the fresh seasonings, followed by the butternut squash, carrots and thyme leaves; everything was gently stirred and cooked for another 5 to 8 minutes.


While that was going on, Errol prepared the salted meat next. Washed thoroughly with lime juice, it was de-fatted and cut into small pieces and brought to the pot.

The corn soup is bubbling away!


All that was left to do was season the pot. Salt, brown sugar, red pepper flakes, black pepper and onion powder were added; the pot was covered and left to simmer for a few more minutes. The final product is seen below.

Care for a bowlful? :-)

And that, as we say, was that. One giant pot of deliciously filling corn soup.
It just hit me that I’m sure that later today this dish will most likely be sold on the street – that’s the beauty of our foods, they can fit in anywhere, any time for any celebration.

Here’s to Independent Trinbagonians everywhere, my friends. Thanks for checking out this day’s offering, and like I always say… doh forget to mind the pot!

Enjoy.


Wednesday, August 1, 2012

Making Zesty Ground Seasoning

It’s Emancipation Day today, a day where Trinbagonians commemorate emancipation from slavery. Rather than take in the celebrations going on throughout the land, I’m celebrating my emancipation from the office and enjoying some more freedom in the kitchen instead.

Now I know that time and time again on this blog of mine, you’ve been seeing me add spoonfuls of a unique combination of blended herbs to my stews, soups and rice dishes. It’s my own version of what we call ground seasoning, which I always keep on standby. Interestingly, what we call seasoning is what North Americans would probably consider to be regular herbs and vegetables, since we use things like thyme, celery and peppers in there, and they are not really flavouring agents. We local cooks however, have been able to turn these simple “herbs and vegetables” into concoctions that have been flavouring many a curried, stewed or baked dish for years, all of which have you licking your fingers.

I used to think that it was just a Trini thing to have a little bottle of that special something hidden away in the fridge, but I know now that it’s a cook’s thing. The Spanish have their blends, the Barbadians have their blends, Dominicans have their blends… you see what I mean? And when it comes to my own blends, they are never ever the same combinations in a row, simply because I don’t always get the same kinds of fresh herbs each time (given availability or weather fluctuations). But the one constant is that I always do it with love – like every other dish I make.

On this occasion, Errol managed to find a huge bunch of seasonings at the market that included some classic favourites including Spanish thyme, which used to grow in our back yard when I was little and Granny practiced her sweet hand cooking. (I swear, the thing looked like a giant green bridal bouquet, and he even presented it to me as such!)
Cradling the greenery in my hands, I took my time to assess what I was about to work with this instance… here’s how it went down.

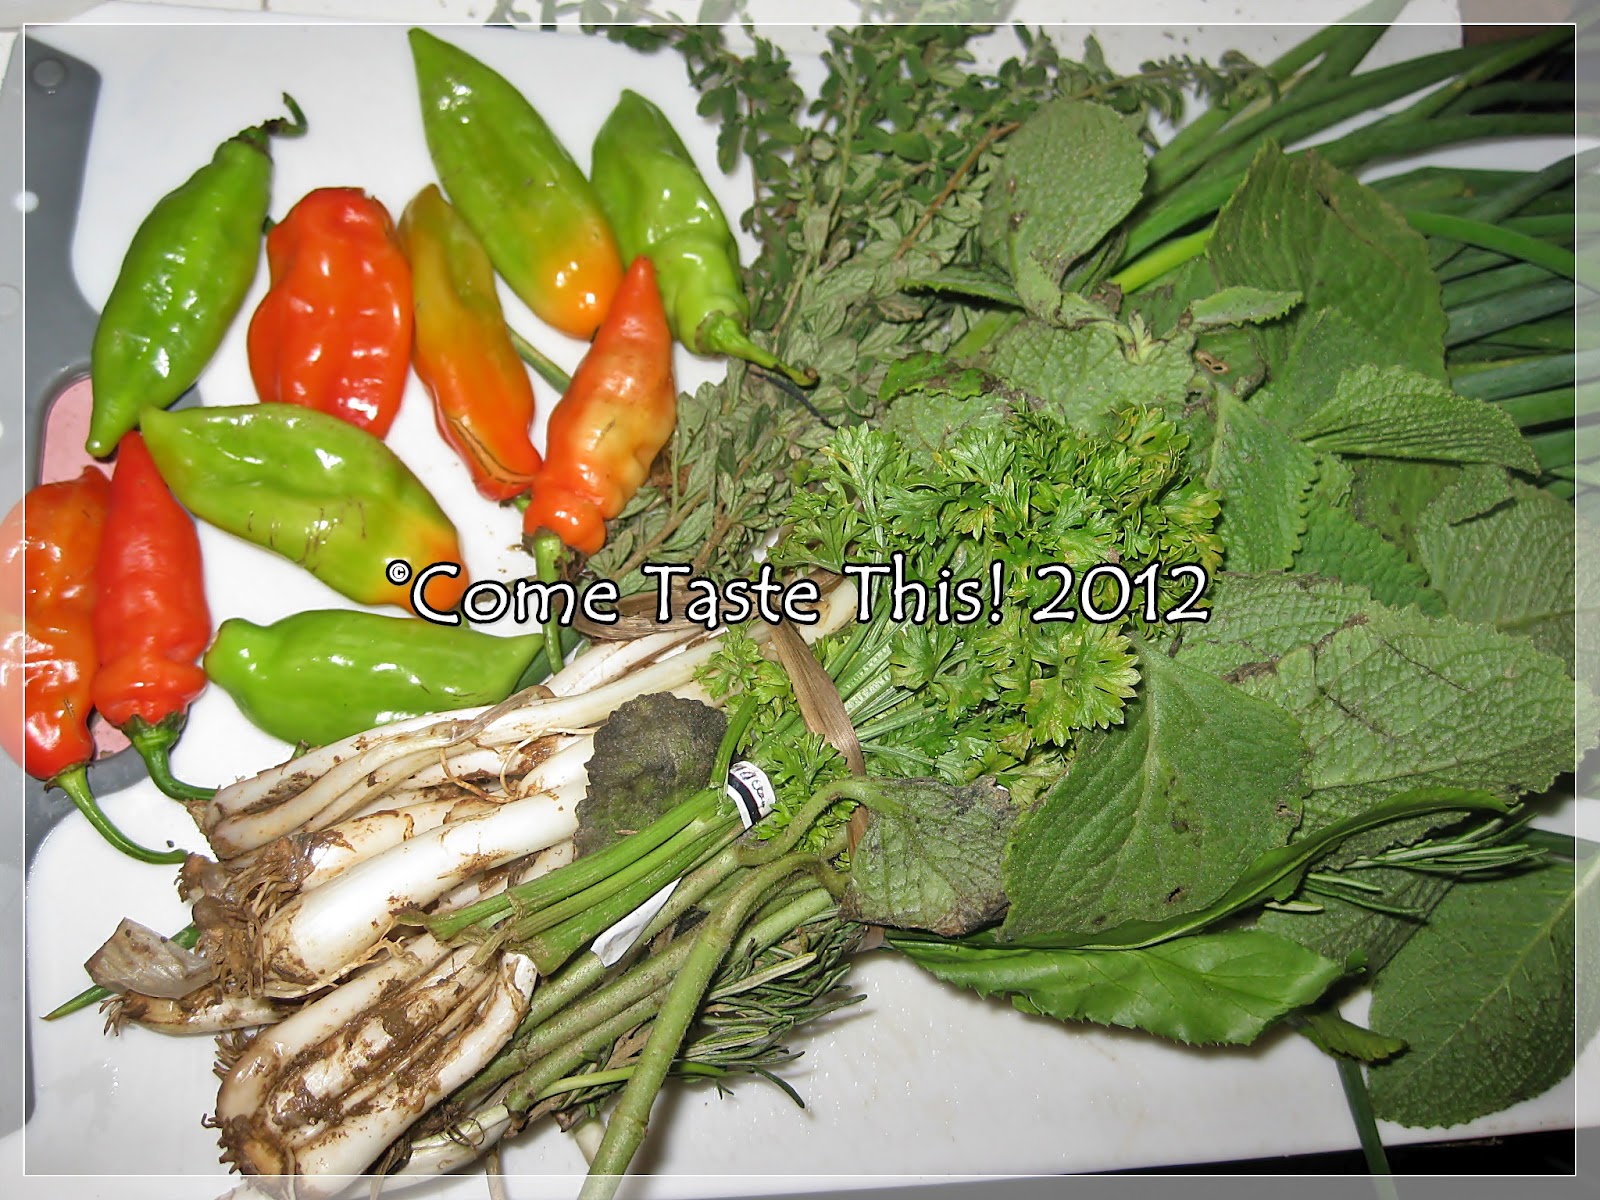
My giant bouquet of seasonings and accompanying pimento peppers seemed like a task to separate and wash, but I’m an old hand at this.

So, here’s what I was dealing with. Rosemary (top left), oregano (bottom left), parsley (top right) and Spanish thyme (bottom right), plus the bunch of chives they were attached to…

Plus there was chadon beni (top left), regular thyme (bottom left), local celery (top right) and pimento peppers (bottom right).

My next step was to separate everything and wash each seasoning ingredient thoroughly. I didn’t use all in the bouquet; there definitely were some leftover bits that went into the fridge.
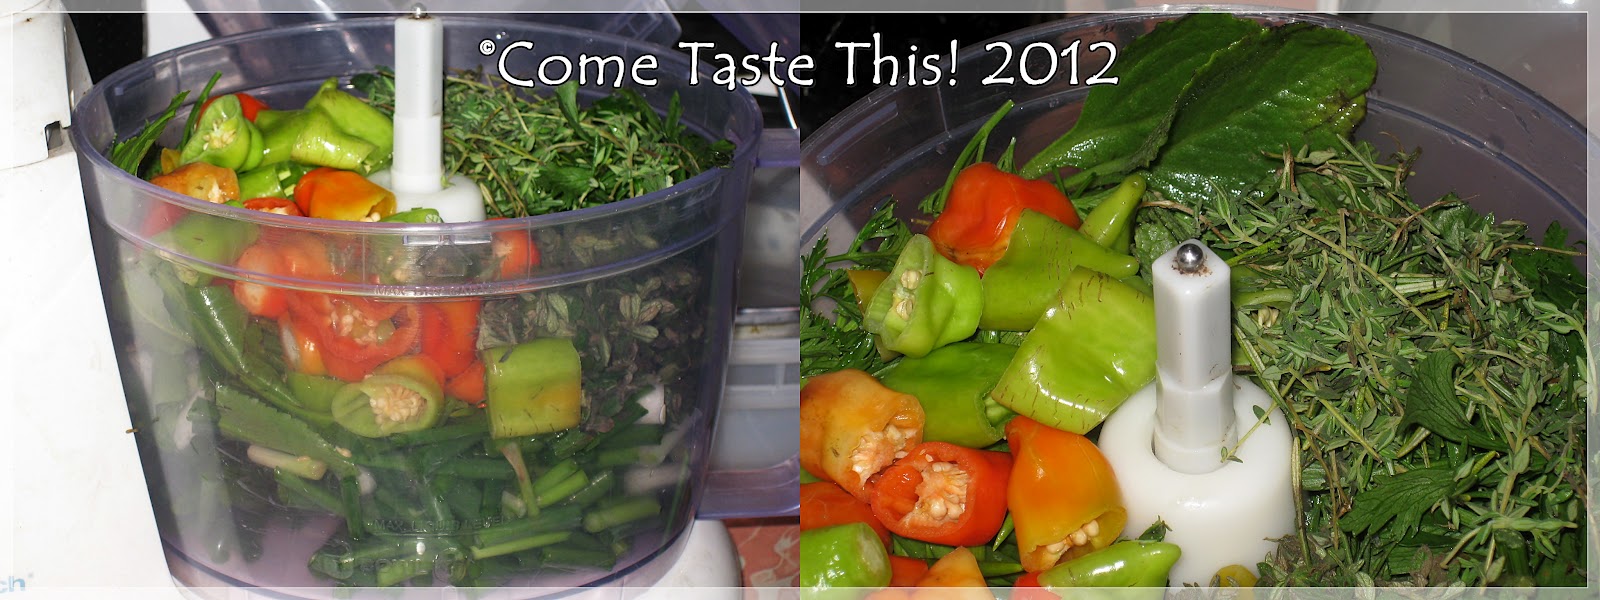
After chopping the chives, chadon beni, parsley, celery and pimentoes, and de-leafing the oregano, regular thyme and whatever else was necessary, everything was placed into my waiting food processor and pulsed a couple of times.

While still at a rough chop, I peeled and chopped up 5 cloves of garlic and added them to the processor and pulsed everything again.

Now for the preservatives… I poured in roughly ½ cup of molasses vinegar and 2 capfuls of rum, followed by a tablespoonful of table salt… and pulsed it again.

All done and ready to decant into a clean waiting glass bottle.

VOILA!


Home made ground seasoning, ready for use in your soups, stews and other lovely dishes!


Like I mentioned before, the seasoning combinations used here tend to change according to what I get. Sometimes, to switch things up, I would add in a hot pepper (minus the seeds), or some fresh, peeled ginger. Some of you may also be wondering why I haven’t used an onion in this, but that’s because I noticed that they tend to break down faster than the rest of herbs. As a result, the seasoning got discoloured after a few days, so I don’t blend them in the mix. I’d chop and add them separately when cooking. 

Once you keep the glass bottle tightly closed and in the refrigerator, the seasoning should last a few weeks; however mine is usually gone before week three. Also, I tend to either shake it out or use a clean plastic spoon or fork to take some out, just so it doesn’t get tainted for any reason.

Well, I hope you enjoyed my take on ground seasonings. If you decide to try making some yourself, let me know how it goes, okay?

So, until next time, take care of yourselves and don’t forget to mind the pot!

Sunday, July 22, 2012

Ribs, Mac n Peas


I know I owe you guys my post on the beef burgers, which I had written, but for some strange reason it disappeared from my laptop. Worry not, I can always rewrite it. Today’s culinary adventure however, couldn’t really wait to be told…

It was one of those days with mid morning rain that seemed to have no end, and I thanked God that I was home and not out trying to navigate my way through it. I also gave thanks that I was able to just stay home and putter around in my tiny kitchen. Had some fun the night before making a simple dinner of egg salad on toast, and the taste was something I hadn’t experienced in a very long time. I used some fresh thyme, chives and parsley in there, and it really upped the flavour content tremendously.
But enough about eggs. My focus – make that my craving – on that rainy Saturday was for barbecued ribs.

As it’s coming close to month end when the stocks tend to dwindle, I had decided to do a nice lunch of ribs, mac and cheese and some green peas on the side, just for the sake of cooking something different. Normally, it’s soup on a Saturday in T&T, but sometimes you just have to feed the need (you know what I’m saying?). Plus, I consider this rib recipe of mine one of my special successes, in that I got my boy Errol to fall in love with them, and pork is not a favourite of his at all. Since then, whenever I say I’m doing ribs, he always smiles and gives me an expectant, “Okay!” 

After dinner last night I took some time out to thaw my racks of ribs, procured by my home girl Hazel all the way in Caroni – it was a meat sale, what can I tell you? (Yeah, that’s how we roll!)


So… let’s get to the action!

The preliminary seasoning began with me peeling off the inside membrane of the ribs and cutting the racks into three-bone servings. I then squeezed on the juice of a fresh lime and a couple capfuls of apple cider vinegar (usually the lime is enough, but I had a small one). After that I let them sit for about 20 minutes while I prepared my dry rub.

In this little bowl I have a mix of 2 tablespoons of granulated garlic, 1 tablespoon dried parsley, 2 teaspoons of paprika, 2 tablespoons jerk powder, 1 teaspoon of allspice, ¼ teaspoon of grated nutmeg, 1 heaping tablespoon of ginger powder, some red pepper flakes, a pinch of salt and a tablespoon (plus a teaspoon) of brown sugar.

So, to get them on the ribs, simply get a plate and a teaspoon. Place your rib on the plate, grab a teaspoon of rub and sprinkle it on. Shake off the excess, turn it over and repeat. You can dip the edges in the rub left on the plate so there’s no wastage.

Place on your baking sheet. I’m using a Silpat (a non-stick silicone sheet) on mine, but you can line yours with foil, or, take your cooling rack and put that on top of the baking sheet and place your ribs on it.

All coated!

Once that was done, I left them to absorb some the rub for about 30 minutes average. However, I left mine for 40 minutes, simply because I needed to get my sides going.

First, the Mac & Cheese. I made it according to the steps on the box, but  I used low fat milk and I Can't Believe It's Not Butter instead.

Then the green peas, which I zested up with some chopped onion and homemade seasoning.

The ribs got covered tightly in foil and were placed on the lowest rack of a 375°F oven and cook for 40 minutes. Trust me, the smell that hit as it cooked literally had me drooling.
In the meantime, my second Silpat covered baking sheet was on standby for the next step… coating with the barbecue sauce!

Out of the oven and they’re looking great! Transferred the pieces to my second baking sheet and working quickly, I poured off the excess drippings from the first and measured out a little less than a cup or so of barbecue sauce.  Using my basting brush, I slathered the sauce well into the ribs, which stayed curved side down for easier handling. Returned them to (the top shelf of the oven) this time for 10 minutes at 350°F.

Second basting. The ribs were flipped over and the process was repeated with the remaining sauce. This time, they stayed in the oven for 8 minutes.

Here they are, cooked to perfection and looking good!

Lunchtime! Here's my plate of ribs, green peas, mac n cheese and a little lettuce. YUM!


So there you have it… tasty, yummilicious oven barbecued ribs that are finger-sucking good! I’ll be honest. These ribs even bring out my inner cavewoman. There’s nothing like grabbing up your meat in your hands and using your teeth to tear off bits a deliciously seasoned flesh, that are just the right combination of sweet, hot and spicy. (And yes, Errol was in his glee!)

Have some fun trying this one out, my dears. Until we meet again, take care of yourselves, and like I always say… don’t forget to mind the pot!